
April 17, 2024
14 mins read
14 mins read


For our latest blog post, RIB’s Auckland-based Senior Consultant Johnathan Mudrovcic has demonstrated how copying and pasting dimensions can save you time and effort when measuring identical areas.
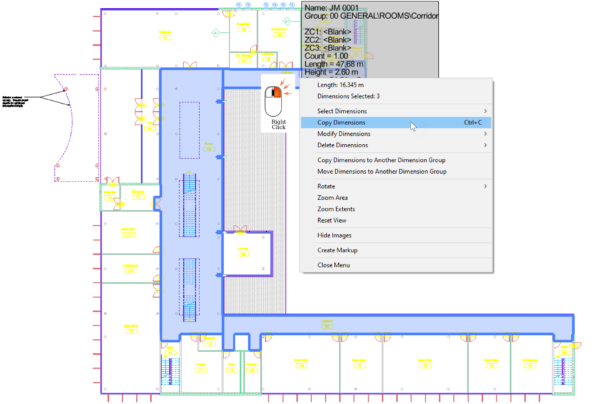
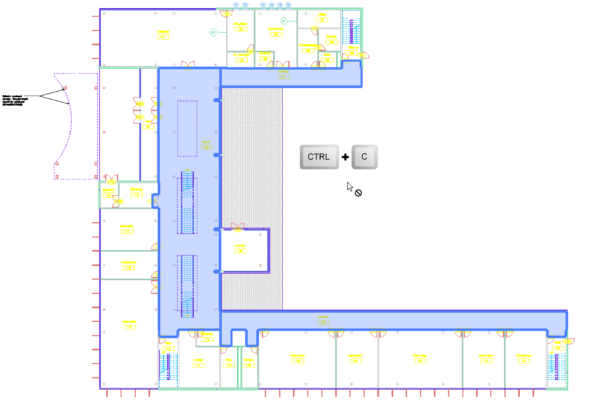
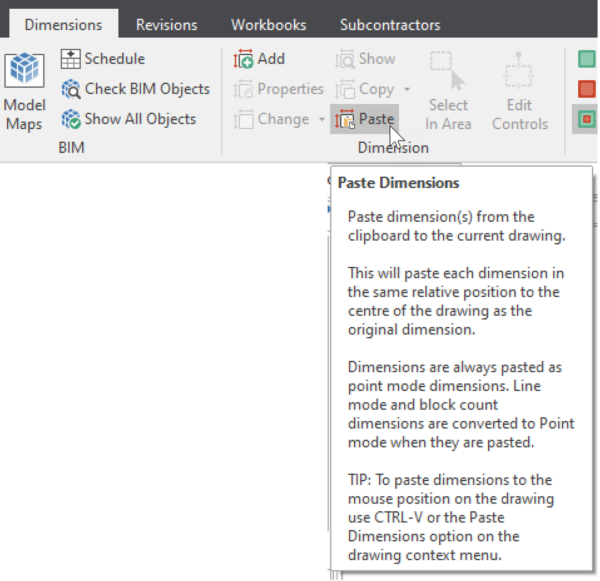
In RIB CostX, you can copy an existing dimension from a 2D drawing and paste it onto the same drawing or another 2D drawing. When you copy a dimension, it is stored in the clipboard and remains there until it is overwritten by another Copy or Cut command, thus allowing you to paste the dimension multiple times in different locations. Pasted dimensions can be edited if necessary.
This feature is most useful when you need to measure multiple identical or similar items at different places. For example, if one were measuring a multi-story apartment block, with the exact same floor lay-out on each floor, it would be extremely beneficial to have the ability to measure one floor area only, select all the Measured Dimensions, copy them, and then paste them to another drawing. This doesn’t only save time, but it also offers visual transparency of the measured dimension, instead of just applying a factor to a single measured area for one floor.
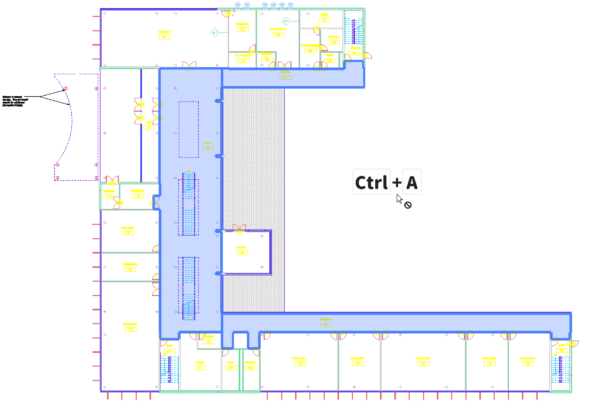
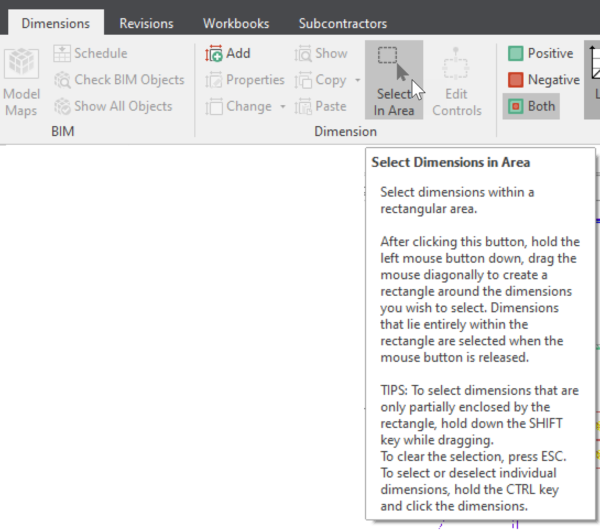
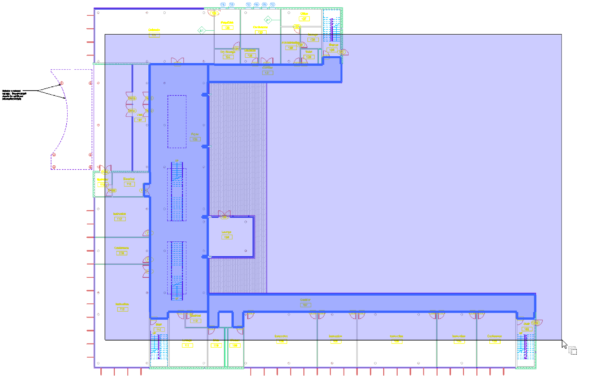
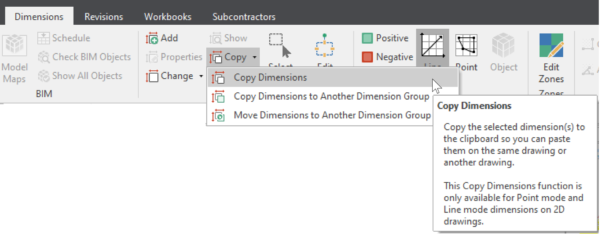
For a user to copy and paste dimensions, the dimensions first need to be ‘selected’. There are various options available for selecting dimensions, as outlined below.


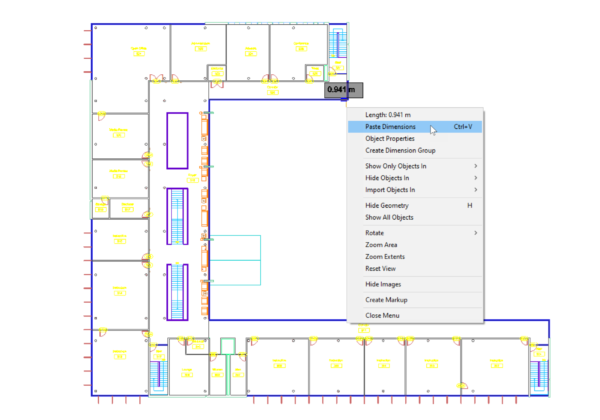
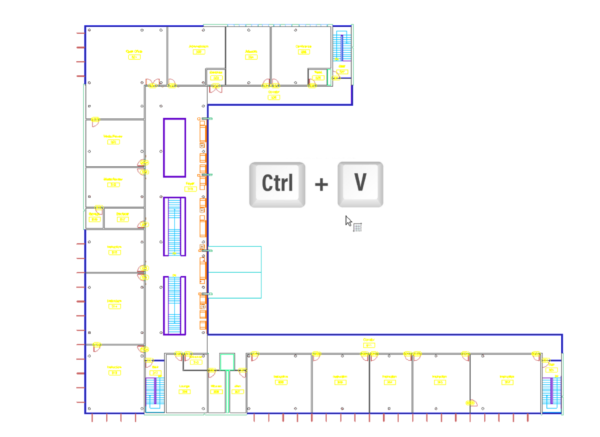
 This method can be used to copy a dimension from one drawing and paste it in the exact same place on another drawing. Once a dimension is pasted, it automatically becomes selected and the dimension edit controls are enabled, allowing you to move, rotate, and mirror the selected dimension.
To move, rotate or mirror a dimension, the dimension needs to be selected before an action can be applied to that dimension. You can use any one of the selection options previously mentioned to select a single dimension or multiple dimensions.
Press F2 or click the [Edit Controls] button in the Dimension section on the Dimensions ribbon.
When dimensions are pasted, they are automatically selected and the [Edit Controls] button is automatically selected for you.
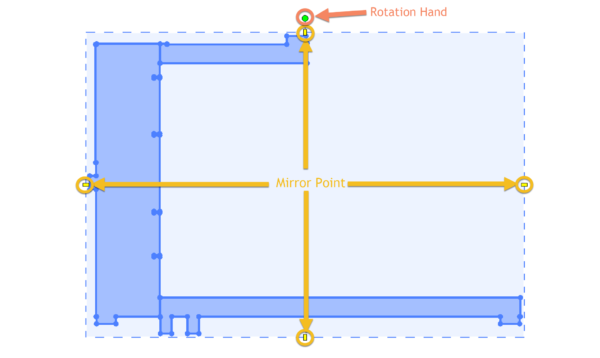
The edit controls box appears around the selected dimension, with a rotation handle at the top and four yellow mirror points on its sides.
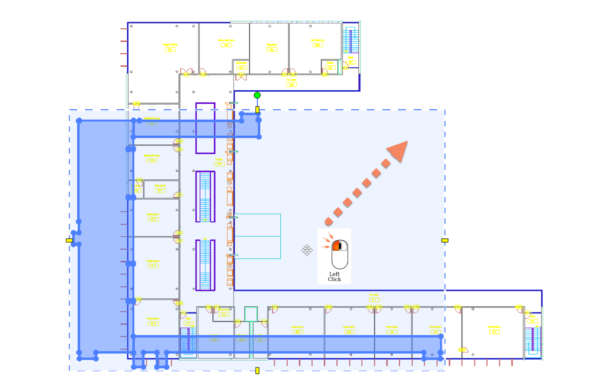
Moving
Place your cursor inside the edit controls box. When the cursor changes to the four headed arrow, click and drag the selected dimension to the new location.
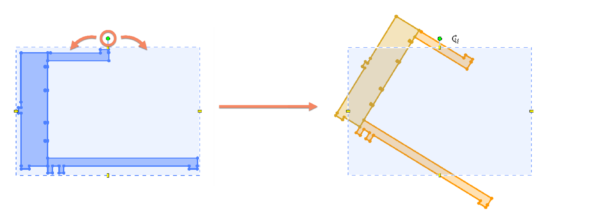
Rotating
Click the rotation handle at the top of the dimension, and then drag the mouse horizontally. Dimensions can be rotated to any angle. As you rotate a dimension, it will snap automatically when it is getting closer to the 90°, 180°, 270° and 360° angles.
Mirroring Vertically or Horizontally
Click one of the yellow mirror points on the sides of the edit controls box. Below shows an example of mirroring a dimension along the X-axis.

To exit the Edit mode and hide the edit controls, press Esc.
This copy and paste functionality may be simple, but it is extremely effective and can save you a great deal of time on complex or repetitive projects. If you have any further questions about the 2D takeoff capability of RIB CostX, feel free to contact your local RIB team today!

E-BOOK