
April 18, 2024
24 mins read
24 mins read


For our latest blog post, RIB’s Austin-based Senior Consultant Justin Hobby has covered some tips and tricks for combining the Variables and Custom Quantities features available in RIB CostX.
As a Consultant, I see many clients overlooking the time-saving capabilities available using our Variables and Custom Quantities features together. When used in tandem, you can improve efficiency and make it much easier to put together complex estimates. This blog post will provide some tips and tricks that you can use when building these Custom Quantities and Variables.
Firstly, I would like to describe the relationship between Variables and Custom Quantities briefly. There are three types of variables that are usable in RIB CostX:
Each of the above Variables can be efficiently referenced in a Custom Quantity. However, we recommend you first create them in System Administration, which we will show you later in this blog.
I also want to mention where our users can locate and create Variables and Custom Quantities. They can be found in two places; inside Dimension Group Properties, and in the System Administration section of RIB CostX.

The below steps will illustrate a Drywall assembly Dimension Group that uses both Custom Quantities and Variables.
To reference Variables in your Custom Quantities, we recommend first creating them in your System Administration. To do this, please follow the steps below.
1. Navigate to the System Administration section in RIB CostX.
2. Navigate to the Standard Variables tab and click the Insert button.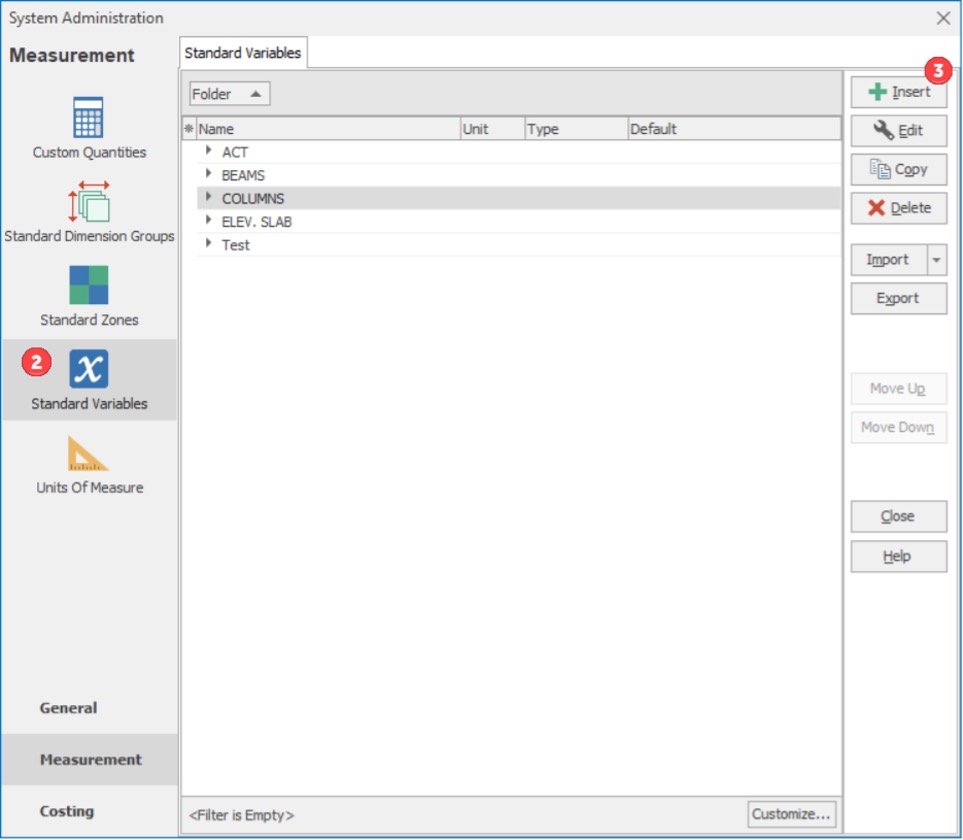
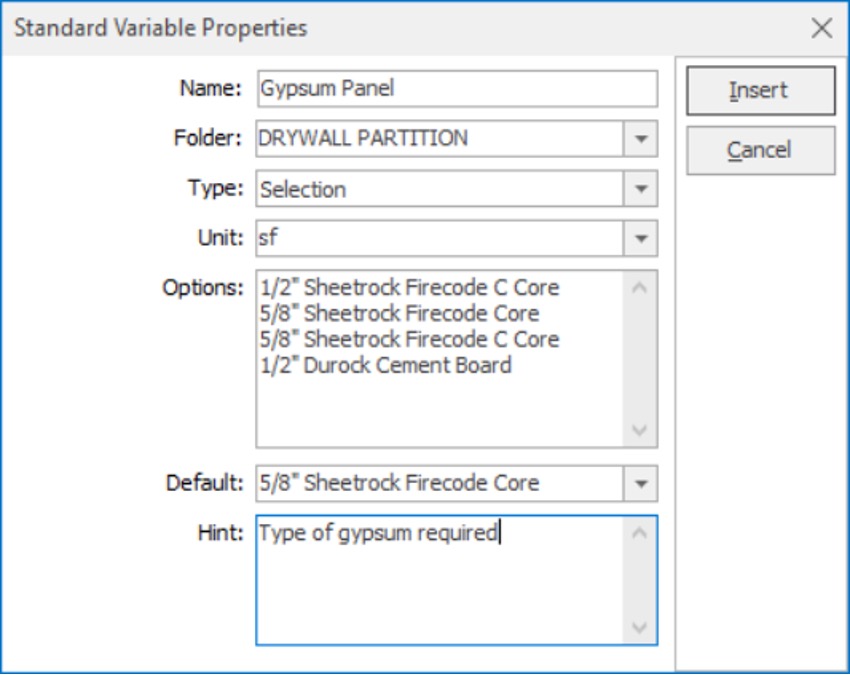
3. The Standard Variables Properties window will display like below: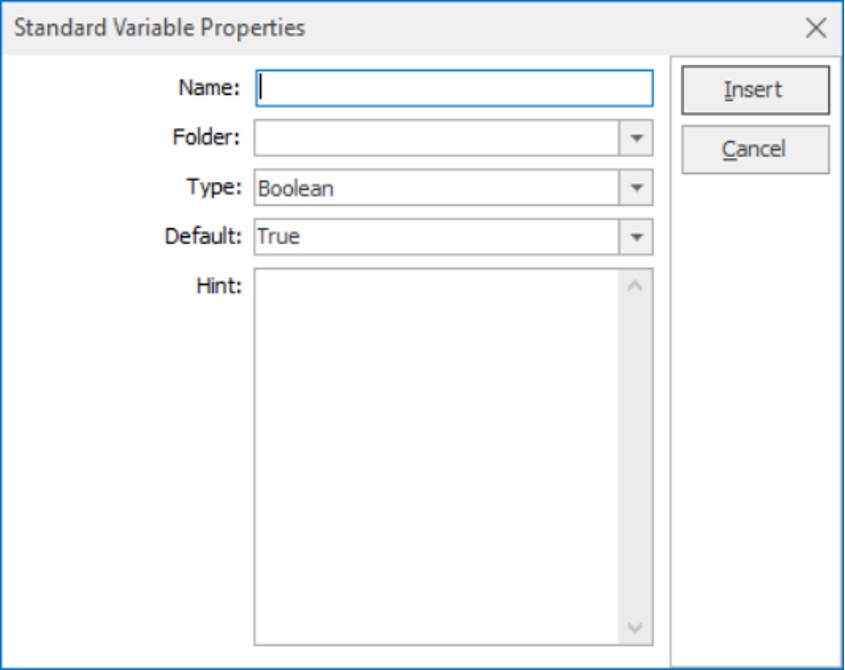
i. Name: variable name
ii. Folder: determines the folder for storing the variable
iii. Type: the type of variable
iv. Default: the default variable answer
v. Hint: This will display when hovering over the variable
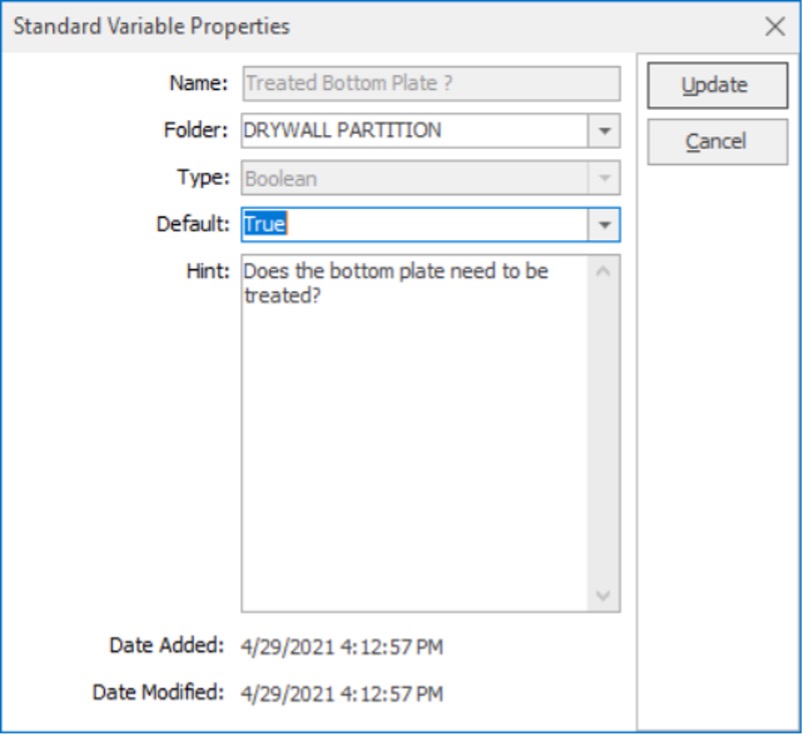
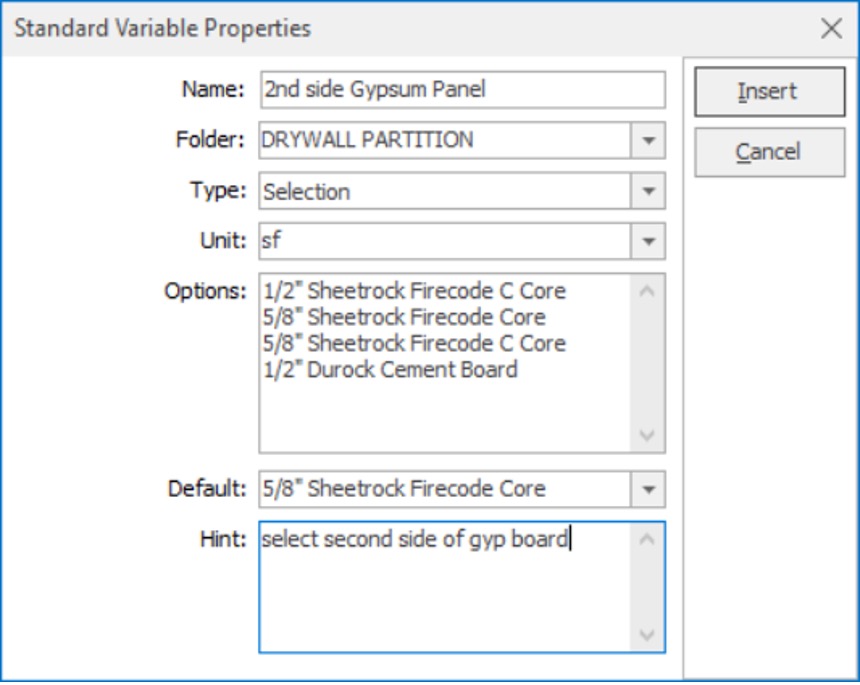
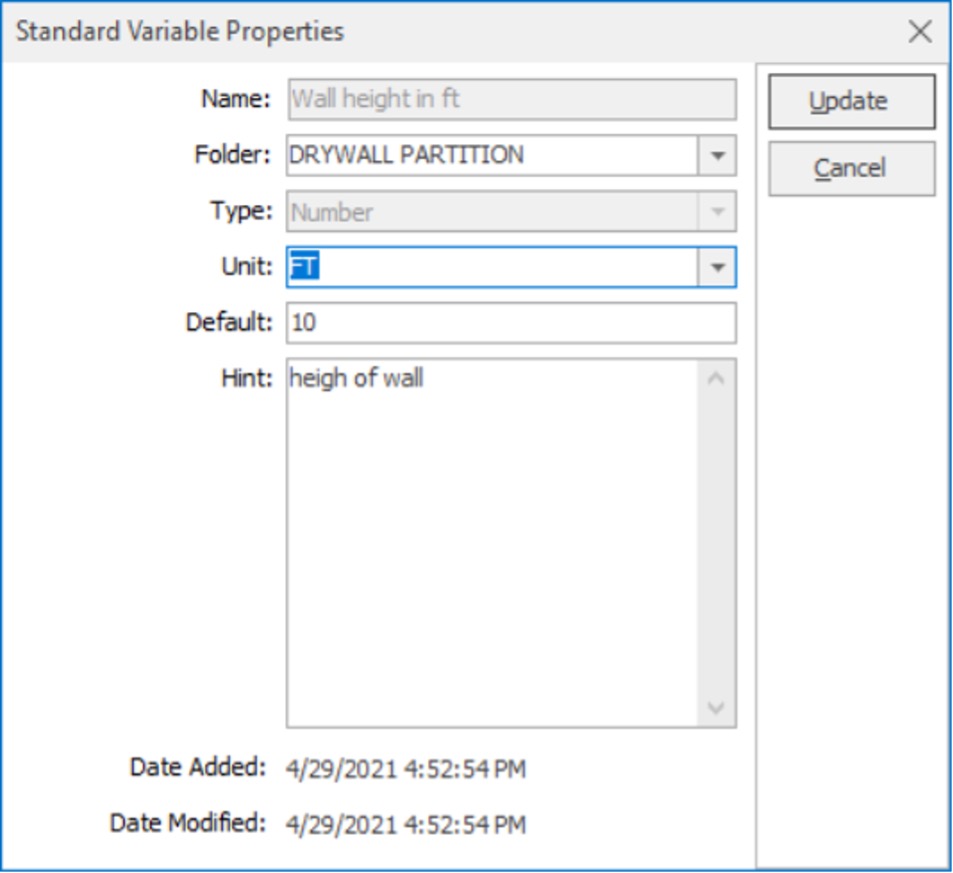
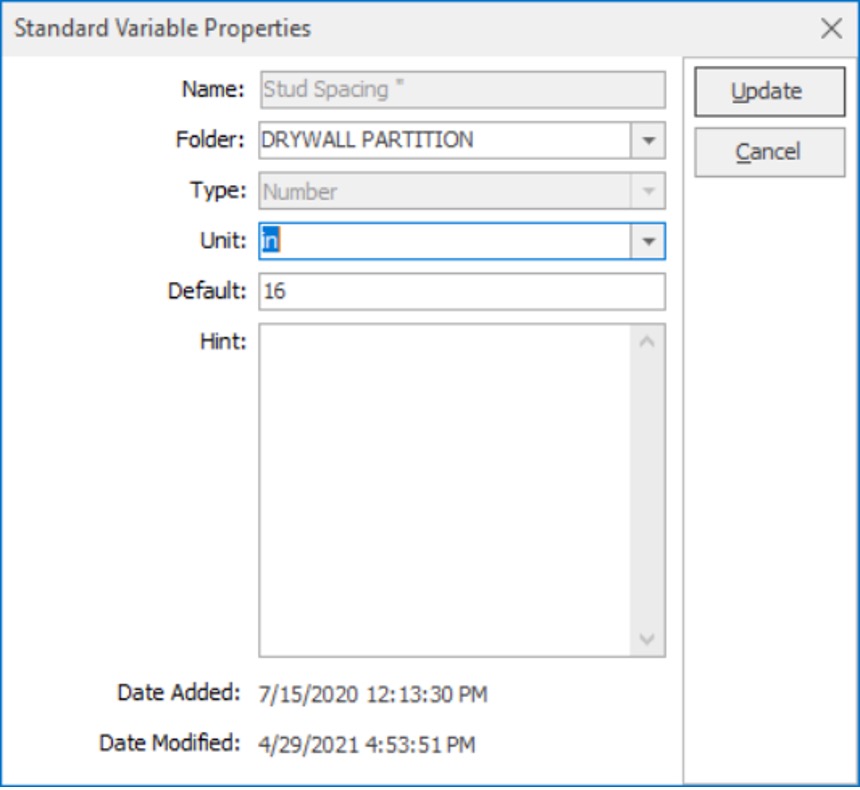
4. Next, we need to create the following five Standard Variables for our Drywall Partitions:
Treated Bottom Plate?
Gypsum Panel
2nd side of Gypsum Panel
Wall height in FT
Stud Spacing”
Once Variables have been setup, we can move onto the next step and incorporate them with our estimating.
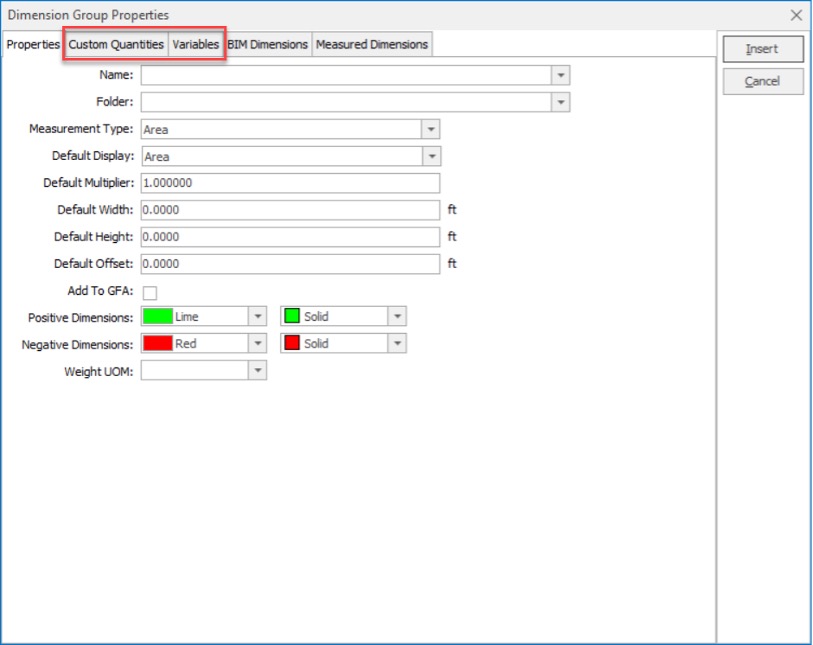
1. We can start by creating a Dimension Group. To do this, go to the Dimension tab and select the Add tool in the Dimension Group section, which will open the Dimension Group Properties window.
2. Next, we can fill out the information for our Dimension Group like below: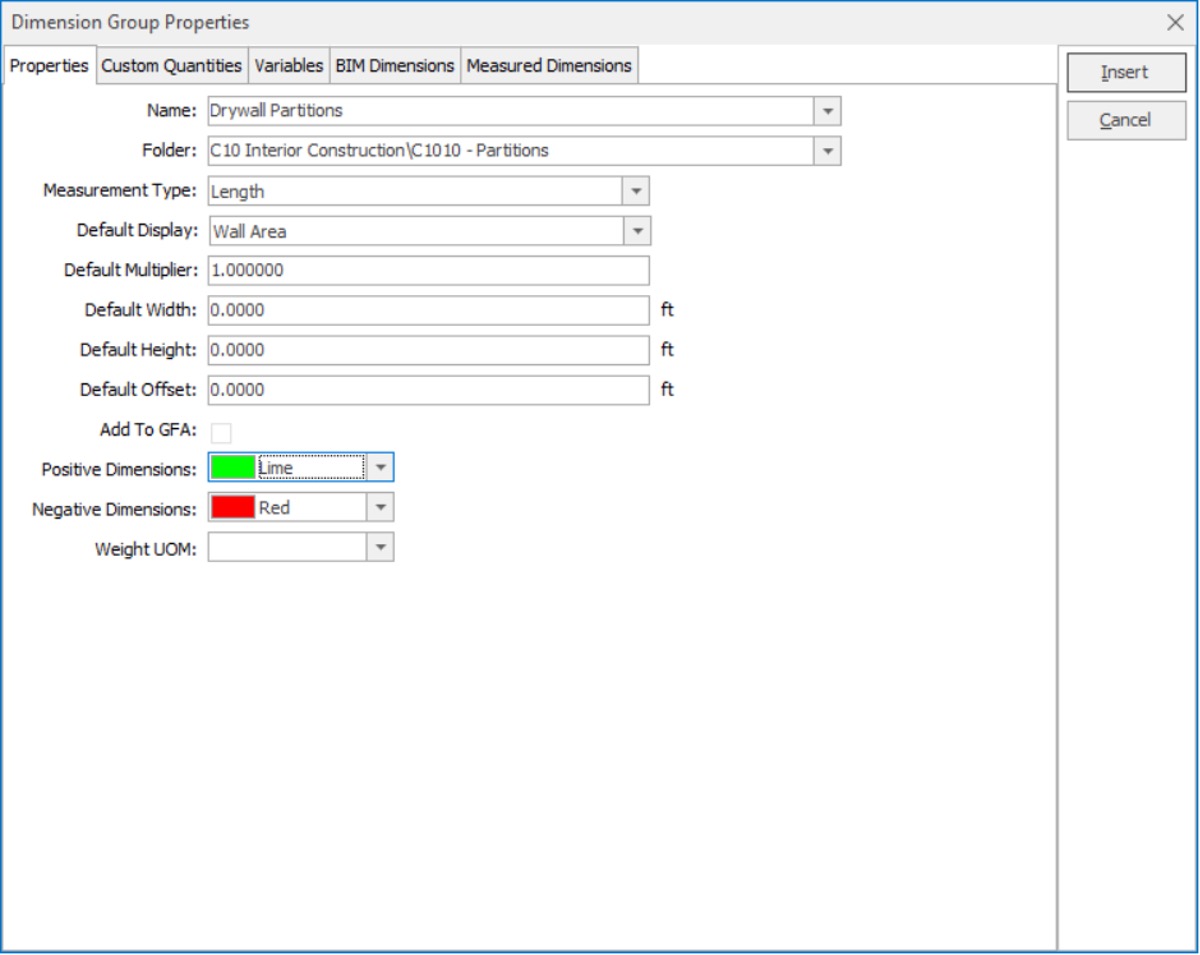
3. Now, let’s click on the Custom Quantities tab. We will add the Custom Quantities that we want to produce. Add them to the Dimension Group by hitting the Insert button.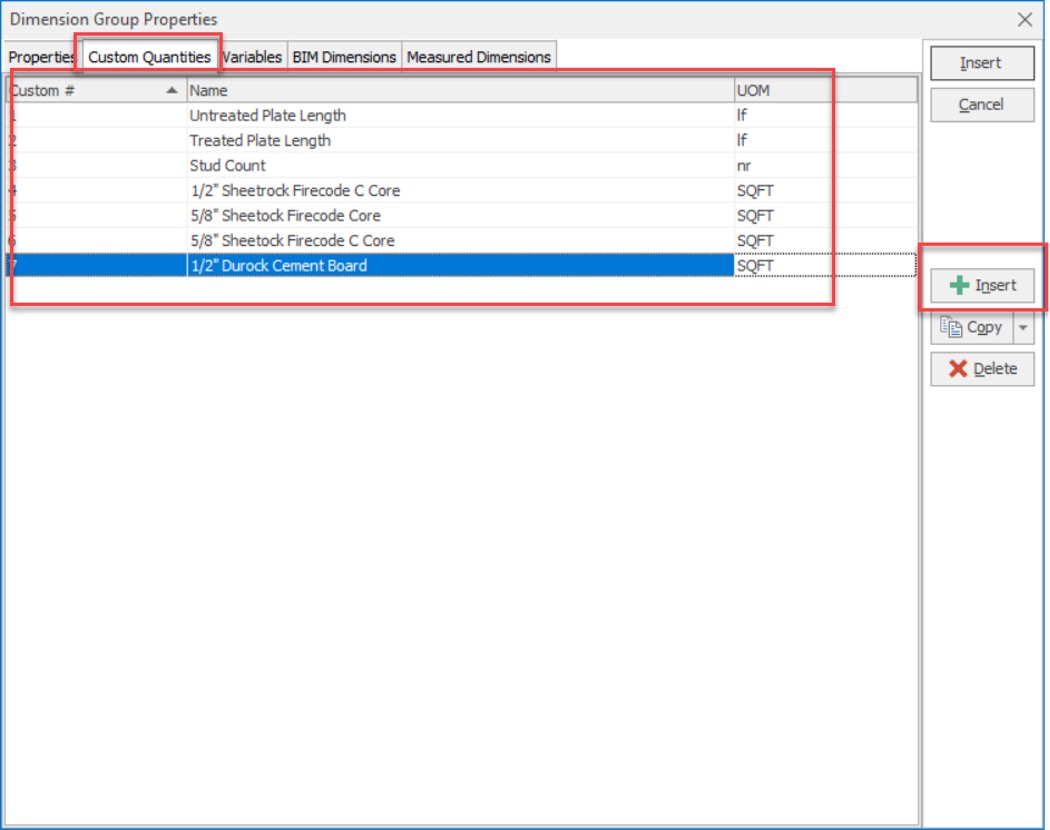
4. Click on the Measured Dimension tab. Here, we will build the formulas to calculate our Custom Quantities.
a. The first step is to change the Height for our measurements to pull from our Wall Height Variable we created earlier. To do this, click on the Use Default checkbox and modify the formula using the ellipsis.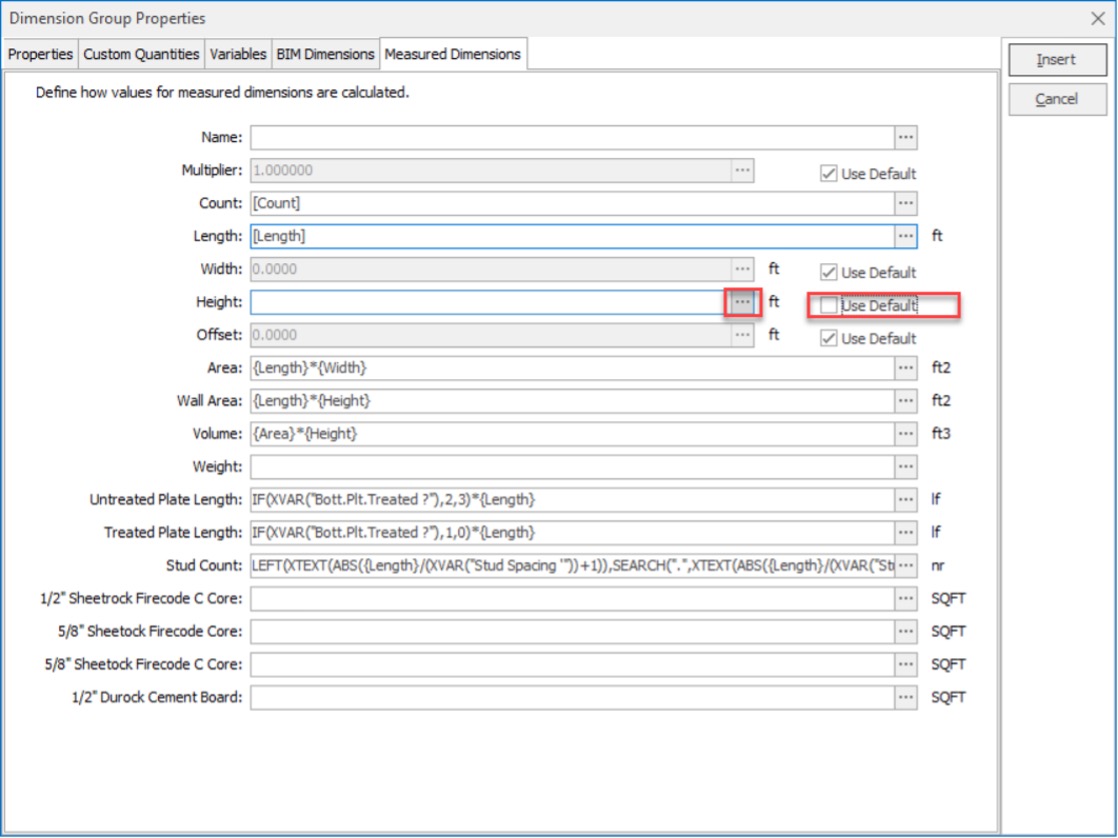
b. The Dimension Group Expression Editor will open. In this editor, we have included tabs for the following:
i. Dimension Fields
ii. Dimension Group Fields
iii. Custom Quantities
iv. Constants
v. Function
vi. Properties
vii. Variables
We want to select the Variables tab. From here, we can double-click on the Variables we created earlier to reference them in our formula. RIB CostX will automatically enter the correct text needed for whatever Variable or Variable answer you select. We want to expand our DRYWALL PARTITION folder and double-click to choose ‘Wall height in ft’.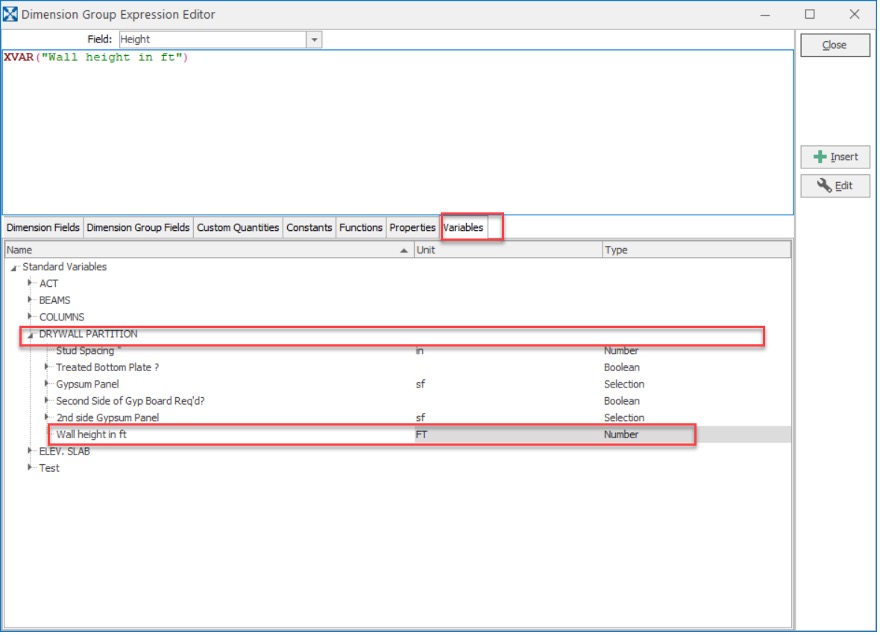
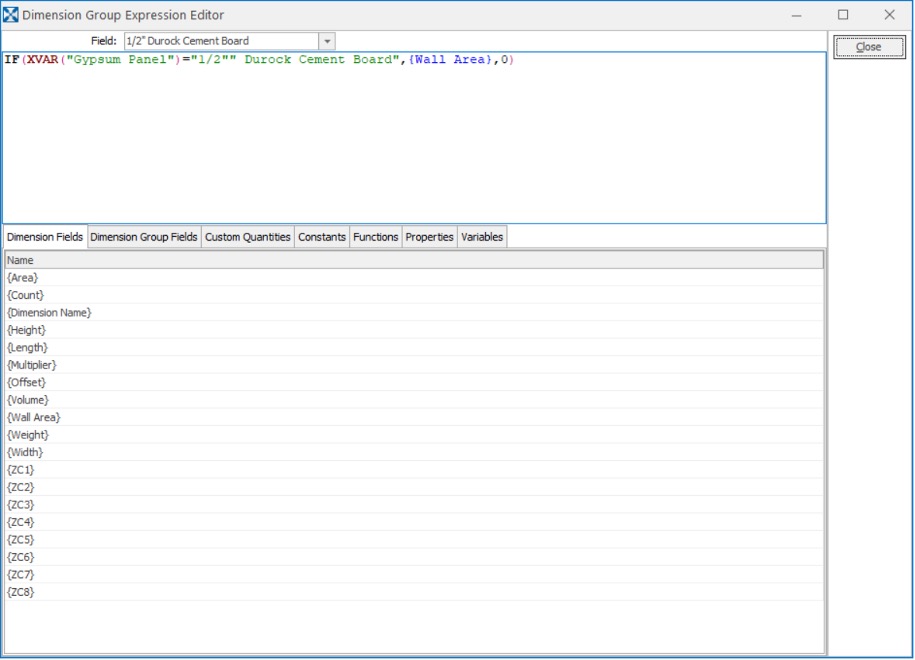
c. Next, I will show you how to create a formula for our different types of gypsum boards. Click on the ellipsis next to ‘1/2″ Sheetrock Firecode C Core’. Next, we want to build an IF statement. To do this, we can click on the Functions tab and double-click on the IF logical function.
d. Then click on the Variables tab, expand the DRYWALL PARTITION folder, and double-click to choose the “Gypsum Panel” Variable and the “1/2″ Sheetrock Firecode C Core” selection. Please note, I added an ‘=’ between the two Variables.
e. Now, click on the ‘Dimension Fields’ tab and double-click on the ‘{Wall Area}’ option. This will take the Wall Area output and use it in your Custom Quantity. This prevents you from recreating the [Length]*[Height] formula used to calculate the wall height.
f. Finally, we add a 0 after the last comma. This should complete the formula, and the red border around the formula should disappear. We will need to do the same thing for the other Custom Quantities as well.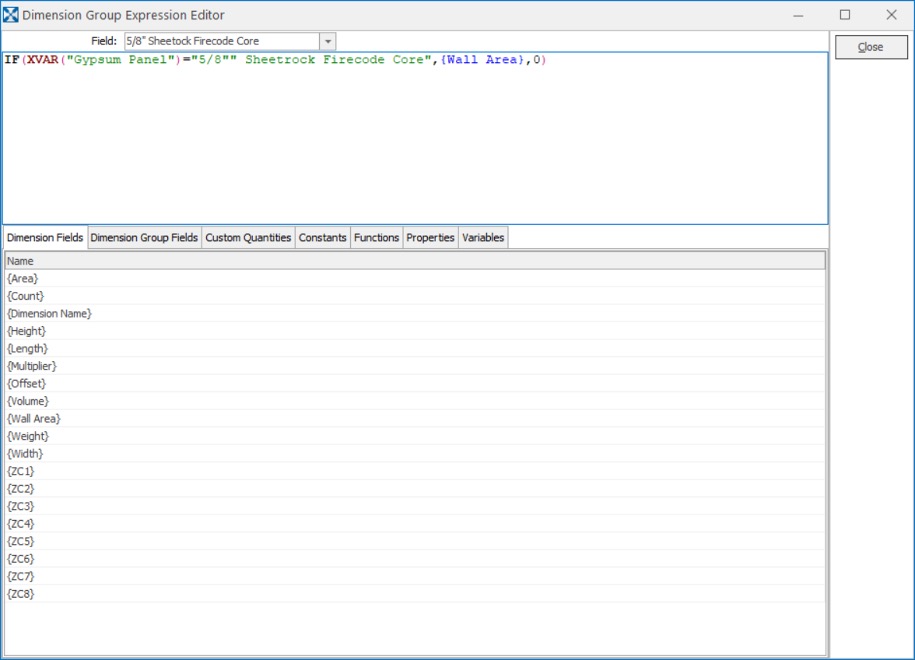

g. We have referenced Variables in our Custom Quantity formulas. If we click back to the Variables tab in our Dimension Group Properties window, we should see our referenced Variables.
5. Now we click the top-most Insert button to add our Dimension Group to our building. If we click to turn on the Properties on Add tool, we can now adjust our Variable answers for each pass or wall that we measure.
6. Now when we measure, our Variable questions will pop up and can be adjusted as required.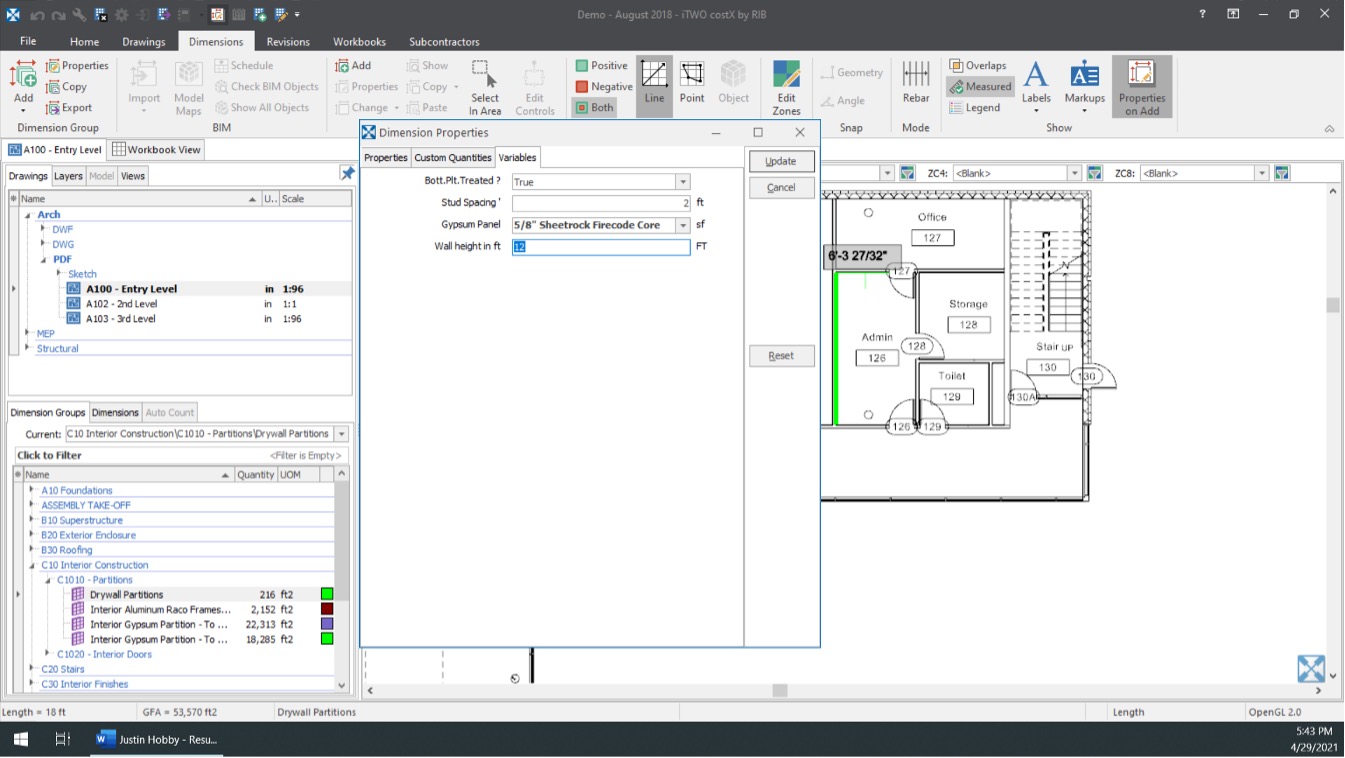
7. If we hover over our measure lines, we can see that we are getting multiple quantities out of a straightforward measurement, allowing the remainder of your takeoff to be completed with ease.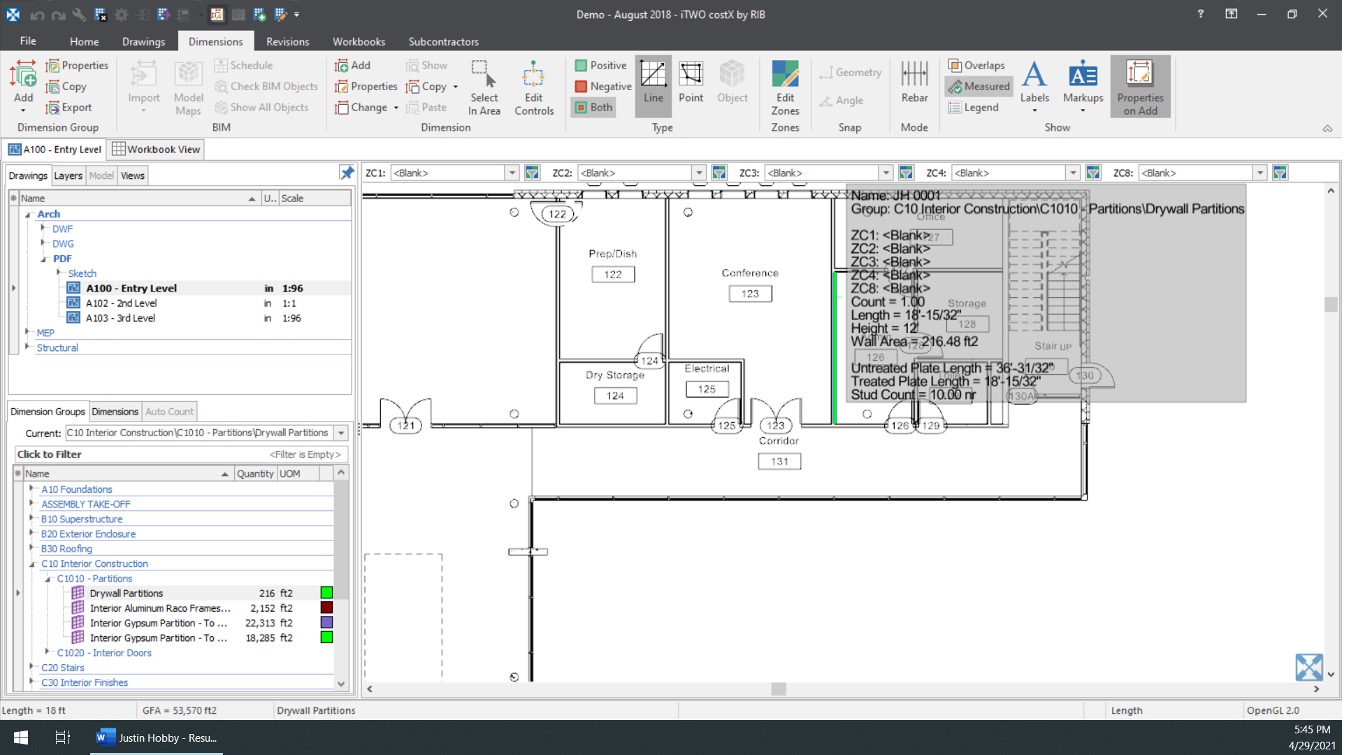
Setting up Variables and Custom Quantities in advance is a worthwhile time investment, as you can proceed through complex estimating without interruption, easily inputting Variable answers as required.
RIB CostX is a powerful platform that rewards those who build intuitive workflows and make the most of all features on offer, and the above is just one such example. If you have any other questions about the advanced takeoff and estimating functionalities available with our platform, feel free to contact your local RIB team today!

E-BOOK